
Table of Contents
This comprehensive guide will help you install, set up, and customize your electric service Pro theme to create a professional and engaging website for your electric service.
Electric Service Pro Theme Documentation
Introduction
Customizing Your Website
Global Settings
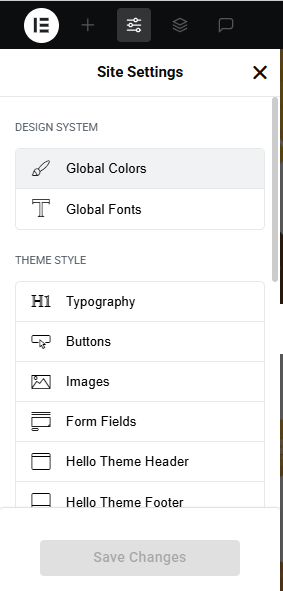
- Go to Elementor > Site Settings.
- Adjust typography, colors, and layout settings.
Header & Footer Setup
- Use Elementor Theme Builder to edit the header and footer.
- Customize the navigation menu, logo, and contact details.
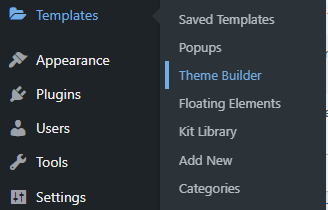

You can drag and drop the elementor widget’s menu first. If you’d like, you can add items or simply drag each one, after which you can add a icon list from the widget and apply a custom style from the style option.
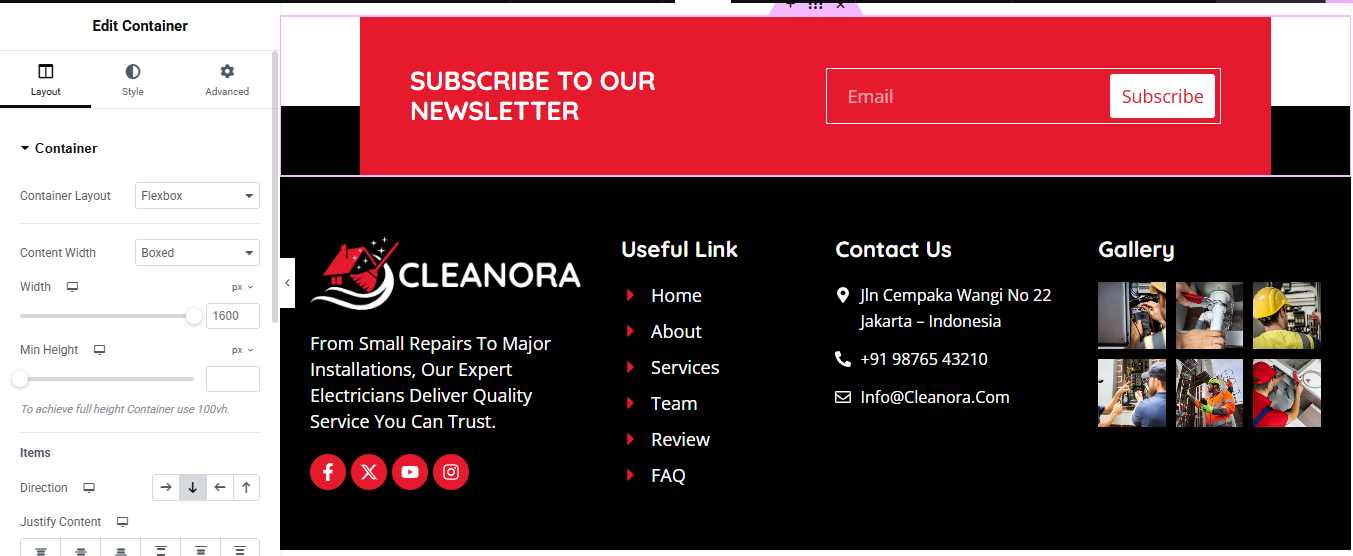
you can add newslatter form, timing, contact details, logo, gallery, menu and if you wish in footer, and create you best design.
Home Page Setup
Using Pre-Built Layouts
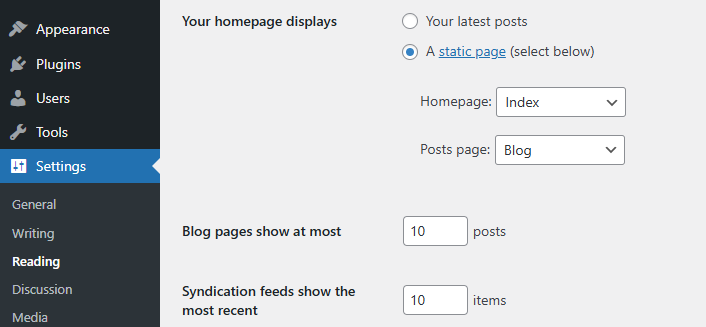
Navigate to Setting >> Reading
Choose the Static Page option.
Choose an existing homepage or create a new one.
Add The Section in home page using elementor
Add components such as these using the Drag & Drop Builder:
- Hero Section
- category list
- who we are
- CTA section
- service section
- why choose us section
- achievements section
- pricing plan section
- team section
- review section
- FAQ section
- blog section
Main Hero Section
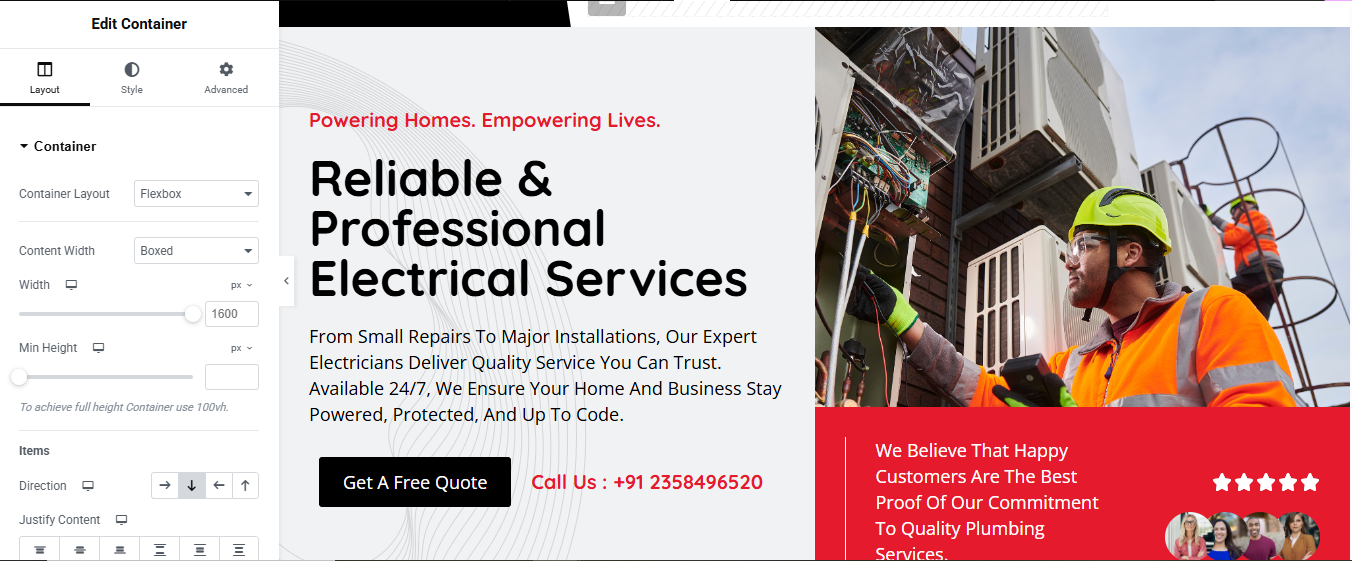
Add a New Section:
- Click the “+” icon.
- Choose a two-column layout (50/50).
Style the Section:
- Go to the Section settings → Layout tab → Set “Content Width” to Full Width.
- Under the Style tab, set a background color if needed (light grey or white works well).
Left Column (Text):
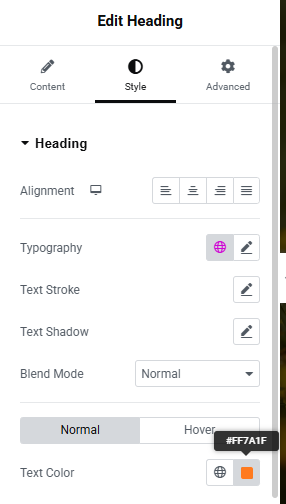
- Drag in a Heading widget → set it as the Subtitle.
- Add another Heading widget → set it as the Main Title.
- Use a Text Editor widget → paste the Description.
- Drag in a Button widget → label it “Get a Free Quote” and link it to your contact or quote form.
- (Optional) Add a Testimonial or Text Editor widget for the 5-star review.
Right Column (Image):
- Select the right column → go to Style tab → set Background Type to “Classic”.
- Upload or choose your hero image.
- Set background Position: Center Center, Size: Cover, and No Repeat.
Category List Section
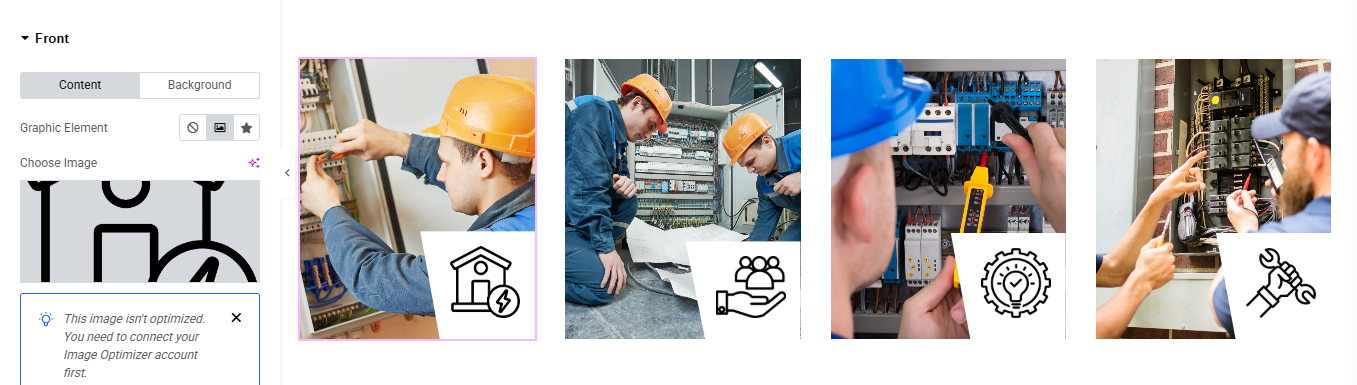
Add a New Section
- Open your page with Elementor.
- Click the “+” button and choose the 4-column layout.
2. Insert Flip Boxes
- Inside each column, drag and drop the Flip Box widget (Elementor Pro required).
- If you don’t see it, make sure Elementor Pro is installed and activated.
3. Set Front Side (Default View):
- Image/Icon: Upload an image icon that represents the category.
- Title: Example: “Lighting Installation”
- Description: Keep it concise
4. Set Back Side (On Hover/Click):
- Use this space for more detail or a call to action.
- Description: e.g., “Discover how we brighten your space with safe and sleek designs.”
5. Style It
- Image Size & Position: Go to the Style tab and adjust the image size for balance.
- Typography & Spacing: Use the Style → Typography settings for headings and text spacing.
- Color Scheme: Match with your site branding — subtle hovers often look clean and professional.
6. Duplicate the Flip Box
- Right-click → Duplicate the Flip Box widget for the next three columns.
- Replace content in each with your new category icon, title, and description.
Who We Are Section
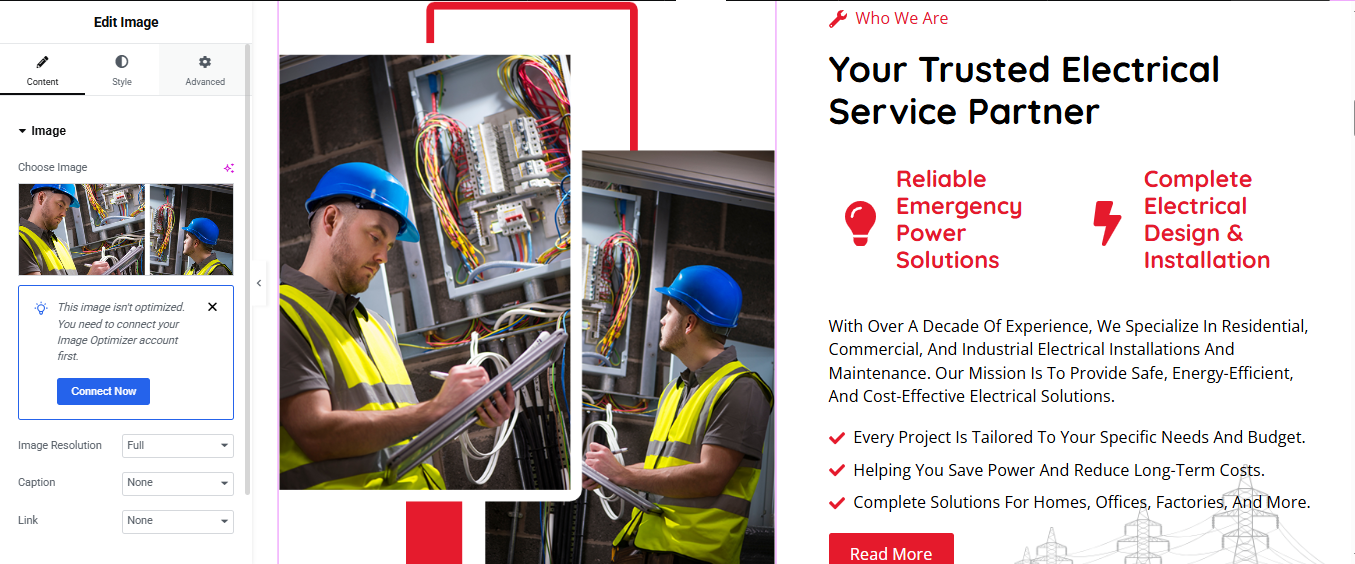
Add a New Section
- Click the ➕ icon → select a two-column layout (50/50).
- Set Content Width to Full Width for a clean, wide layout.
2. Left Column — Insert Image
- Drag and drop the Image widget.
- Upload or choose your photo.
- Align it (e.g., center or full height) under the Style tab.
- For full vertical stretch: Section settings → Height: Min Height, e.g., 600px Image → Advanced → set Vertical Align: Middle
3. Right Column — Add Text and Content
- Subtitle: Drag a Text Editor or Heading widget Set it as smaller text like “Who We Are”
- Title: Add a Heading widget Use a strong headline like “Trusted Experts in Electrical Services”
- Icon Boxes (Two):
- Drag in an Inner Section into the right column → make it 50/50.
- In each column, drop an Icon Box widget:
- Bullet Points: Add a Text Editor or use the List widget Example:
- Button: Drag in a Button widget labeled “Learn More” Link it to your About page or contact form
CTA Section
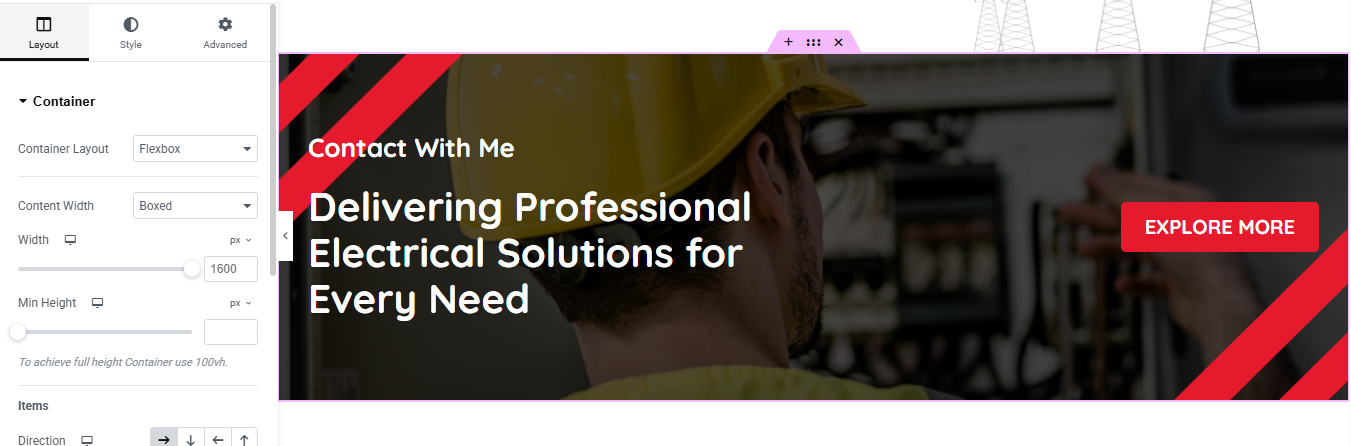
Add a New Section
- Click the ➕ icon in Elementor → choose 1 column layout.
- Set Content Width to Boxed or Full Width depending on your site style.
2. Set Background (Optional but Recommended)
- Go to Section Settings → Style tab.
- Under Background Type, select a color or image that fits your brand.
- Use a light overlay if your background image needs better contrast with the text.
3. Insert and Style the Content
- Subtitle: Drag a Text Editor or Heading widget, style it smaller.
- Title: Drag a Heading widget below the subtitle, use a bold engaging message.
- Button: Drag a Button widget under the text.
- Label it: “Explore More” or “Call Now”
- Add your link: phone number (tel:+911234567890), quote form, or contact page.
Services Section
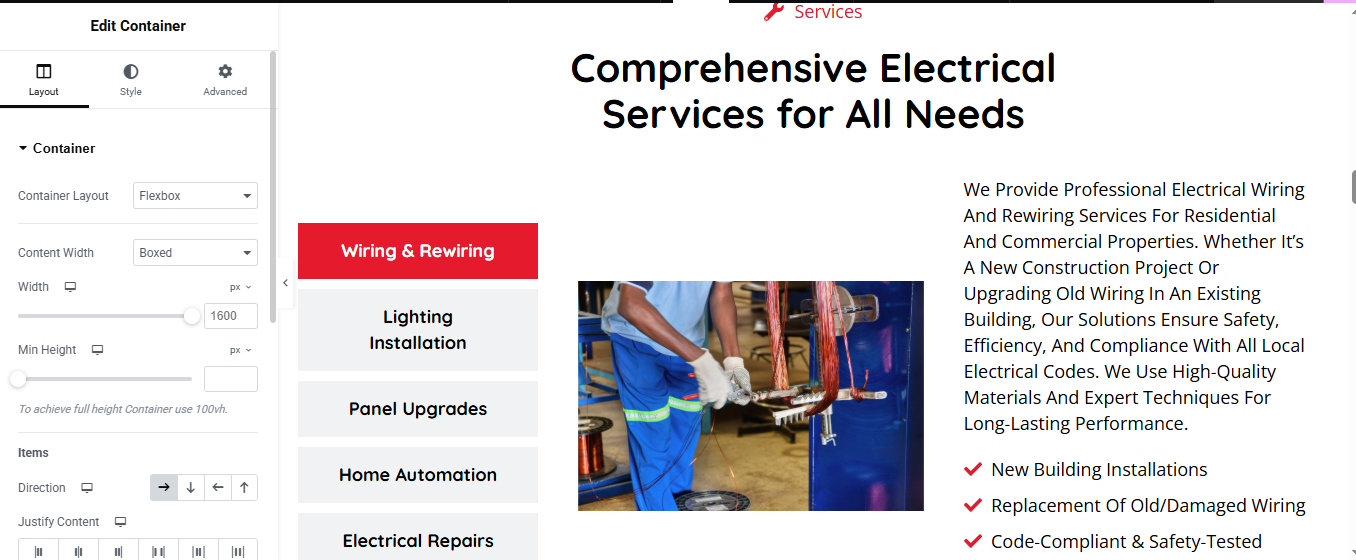
Add a New Section
- Click the ➕ icon in Elementor → Choose a single-column layout.
- Set Content Width to Boxed or Full Width based on your design.
2. Insert the Tabs Widget
- Search for the “Tabs” widget in Elementor (available in free version).
- Drag it into your section.
- It will have default tabs like “Tab 1”, “Tab 2”, etc.
3. Customize the Tabs
- Click on each tab title (left side) and rename them to match your services:
- In the tab content, you can include:
- A short description of the service
- and added image for each service
- Bullet points of features or benefits
- Even buttons or icons
4. Style the Tabs
- Go to the Style tab of the Tabs widget:
- Customize Typography, Spacing, and Colors for the tab labels and content
- Adjust active/inactive tab styles for better UX
Why Choose Us
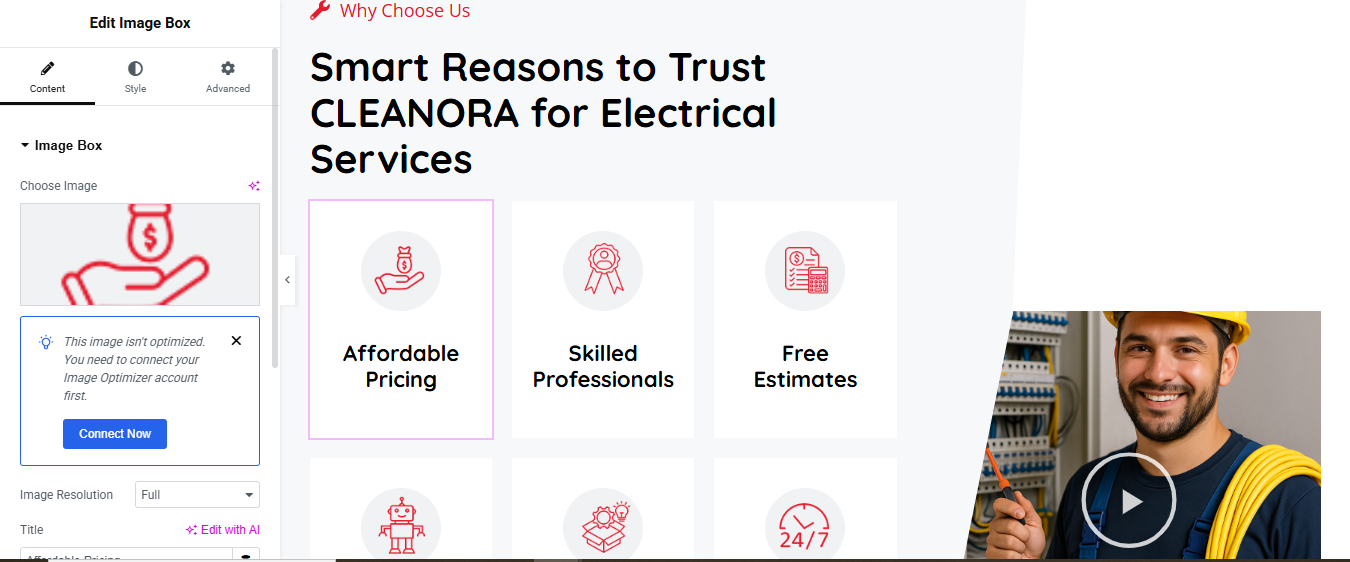
Add a New Section
- Click the “+” icon in Elementor.
- Choose a 2-column layout.
Adjust Column Widths
- Select the section → Right-click → Edit Section.
- Go to Layout:
- Set Content Width to Boxed or Full Width based on your design.
- Click each column handle and set width like:
- Left Column: 40% (for heading and button)
- Right Column: 60% (for image box grid)
Left Column Setup
Add Widgets:
- 2 Heading Widget:
- Style: Small font, uppercase, muted color.
Use Inner Section → Add 2 Columns inside
→ Add Image Box Widgets inside.
You need 2 Inner Sections, each with 2 Columns, giving you 4 boxes total.
Steps:
- Drag Inner Section into the right column.
- Set Columns to 2
- In each column, drag an Image Box Widget:
- Choose Image: Upload an icon.
- Repeat to create 3 boxes:
Style Image Boxes
- Click each Image Box Widget
- Under Style:
- Icon size: 40px
- Icon background: Light gray
- Border radius: 12px (to match rounded look)
- Padding: 20px
- Under Advanced → Border:
- Add a border (1px solid #e0e0e0 or transparent with hover effect)
- Box Shadow: Add subtle shadow
- Border Radius: e.g., 10px
Right Column Setup: video widget
- add the video widget
- added image overlay and add play icon with video play in light box
Achievements Section
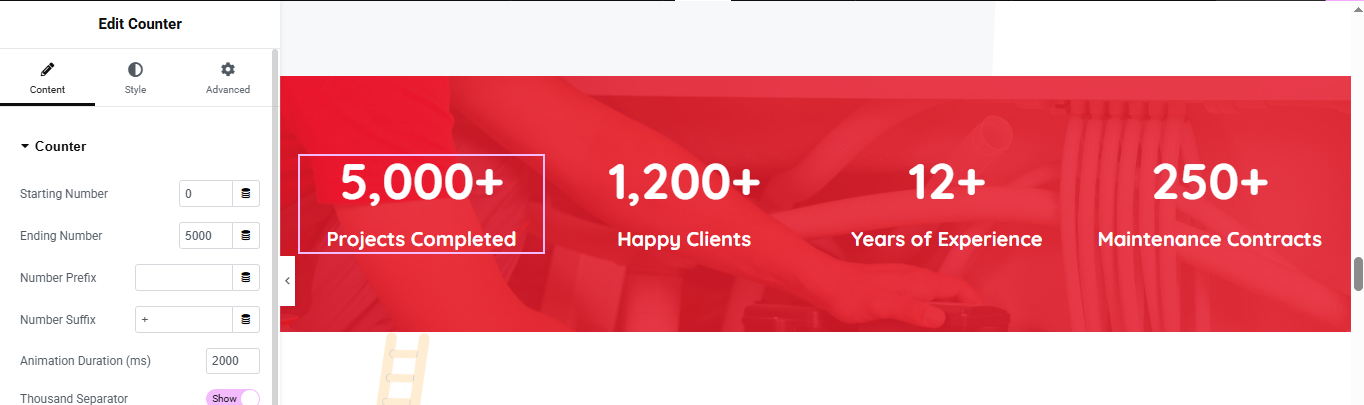
Drag in “Counter” Widgets
- In the Elementor Widgets Panel, search for Counter.
- Drag and drop one Counter widget into each column.
- Edit Each Counter
- Start Number: Usually 0
- End Number: e.g., 150, 2000, etc.
- Number Prefix/Suffix: e.g., +, %, etc.
- Title: e.g., “Happy Clients”, “Projects Completed”
Style the Counters
- Customize:
- Number Color & Typography
- Title Typography
- Spacing
- Alignment (center is most common)
Pricing Plan Section
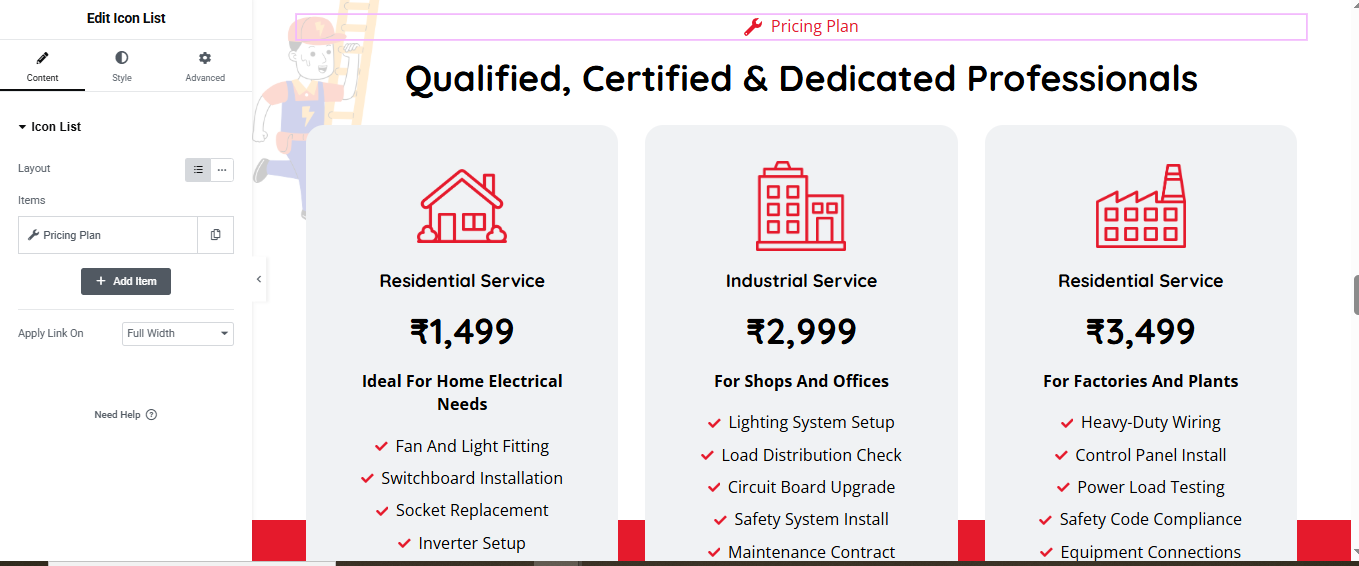
Add a New Section (3-column layout)
- Drag in “Pricing Table” or “Inner Section”
- Add content manually if free Elementor
- Each column = 1 plan
- Add:
- Title (Basic, Premium, etc.)
- Price (₹199/month)
- Feature List (✓ Feature 1, Feature 2…)
- Call-to-action Button (e.g., “Buy Now”)
Style Section
- Add hover effect, border, background color
Team Section Section
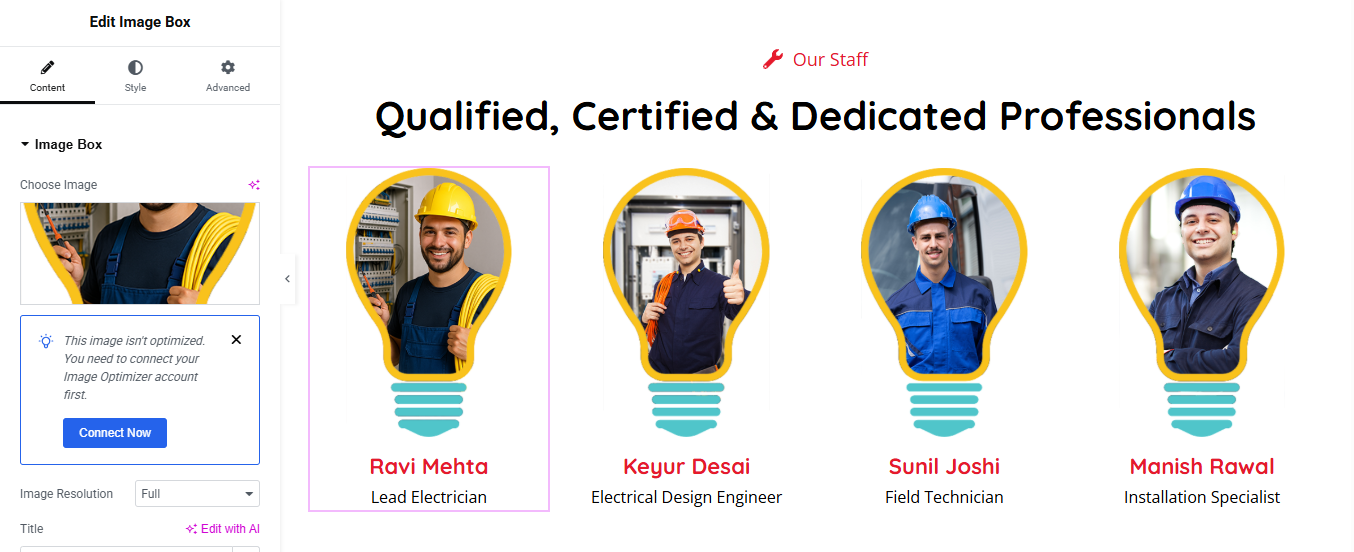
Add a New Section
- Click ➕ → choose 1 Column layout
- Drag in Heading widget → add your Subtitle
- Drag in another Heading → add your Main Title
- Style them (alignment, typography, color) under the Style tab
2. Add Inner Section for Team Layout
- Drag an Inner Section widget below the titles
- Right-click on a column → Duplicate 3 times (you’ll now have 4 columns)
3. Add Team Member Content to Each Column
- For each column:
- Image Widget → Upload team member photo
- Heading Widget → Add Name
- Text Editor → Add Role (e.g., “Senior Electrician”)
- (Optional) Add Social Icons Widget
- (Optional) Add Text Editor for a short bio or description
4. Style the Team Cards
- Select each column or inner section → use the Style tab to:
- Set background color or border
- Add padding for spacing
- Add hover effect if desired
Testimonial Section
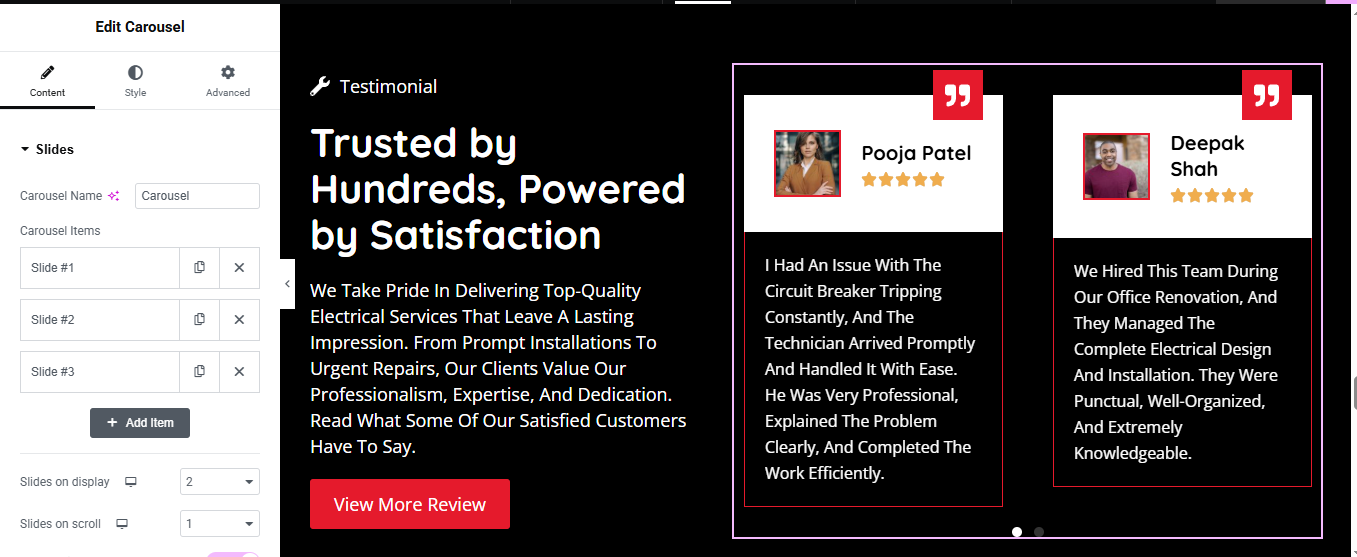
Manual Setup
- Add a New Section (3 or 1 column layout)
- Drag in “Testimonial” widget
- (Pro) or use Image Box/Text Editor to create your own
- Add multiple testimonials
- With Image, Name, Stars, and Feedback
- Optional: Add Carousel (Pro only)
- Use Testimonial Carousel for rotating reviews
- Style It
- Typography, spacing, image size, star color
FAQ Section
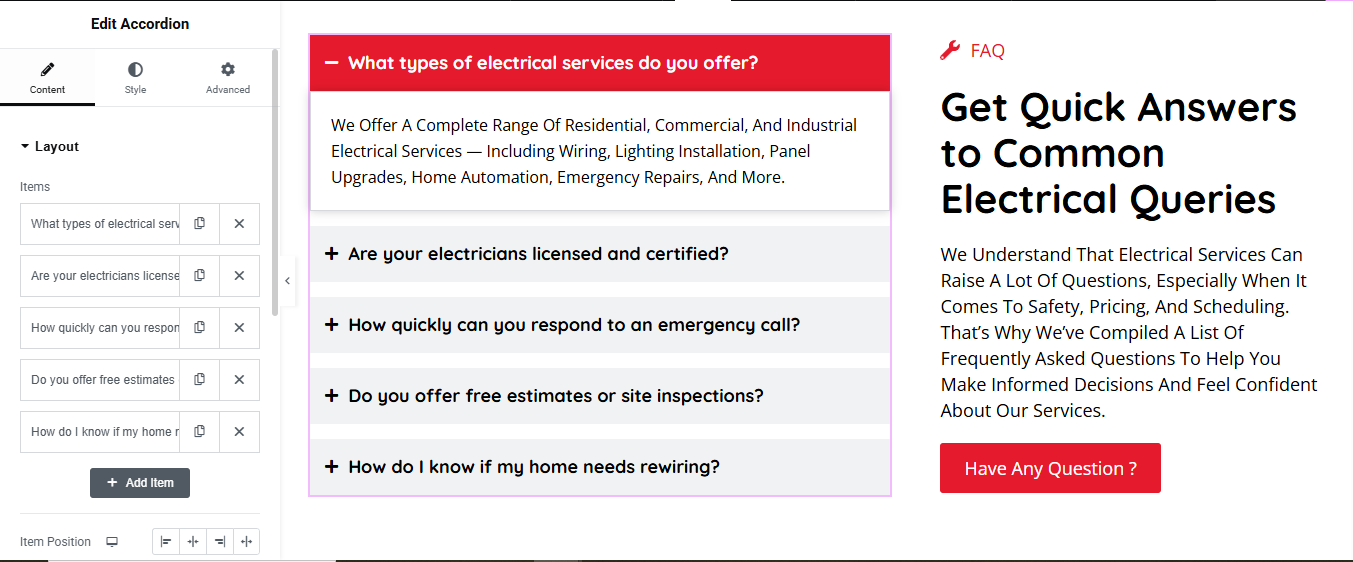
Add a New Section
- Click the ➕ icon → select a two-column layout.
- Adjust column width: Left 65%, Right 35% (you can tweak this visually).
2. Left Column — FAQ Accordion
- Drag in the Accordion widget (available in Elementor Free).
- Edit each accordion item:
- Title:
- Content:
- Add 4–6 questions depending on your need.
- Under Style tab, customize:
- Typography
- Spacing between items
- Colors for question/answer and icons
3. Right Column — Text & CTA
- Now fill the right column with your content stack:
- Subtitle (Small Heading):
- Main Title (Large Heading):
- Description (Text Editor):
- Button (Call-to-Action):
4. Styling and Polish
- Make sure vertical alignment is set to Middle for both columns.
- Add padding and margins to prevent crowding.
- Optional: Add a background color or image for visual separation
Blog Section
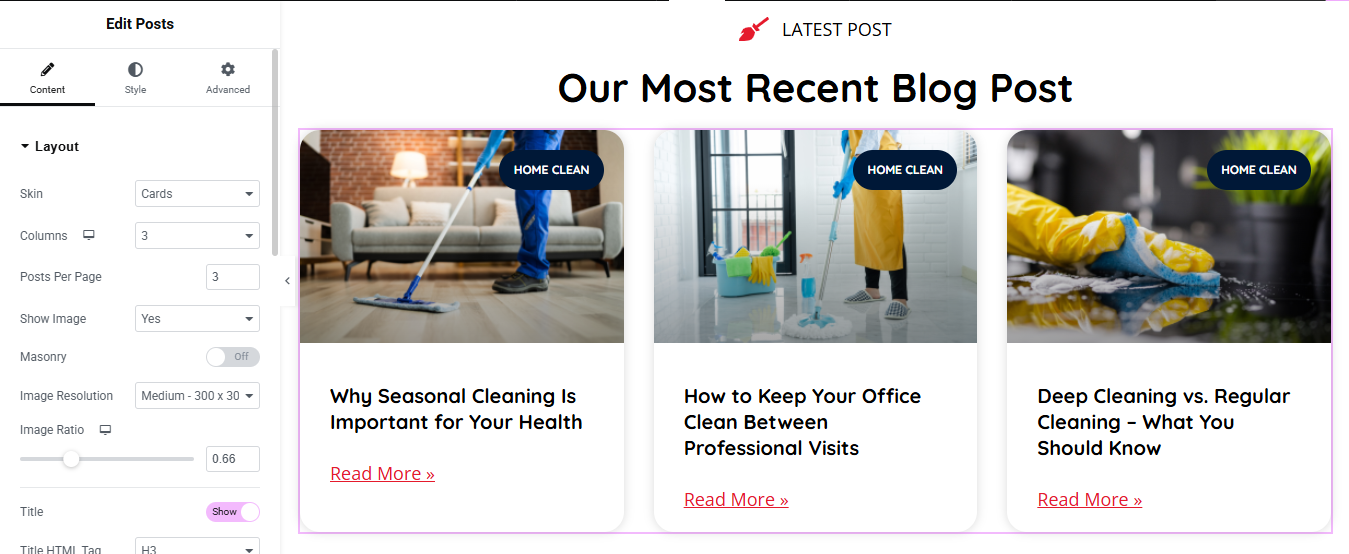
Add Posts Widget
- (Choose method based on Elementor version)
- Elementor Pro (Posts Widget)
- Drag the “Posts” widget into the section.
- Posts will automatically show your latest blog posts.
- Customize:
- Layout: Grid / Carousel / Masonry
- Columns: 2 or 3 recommended
- Show/Hide: Title, Excerpt, Author, Date, etc.
- Image Size: Thumbnail, Medium, Custom
Style the Blog Section
- Use the Style tab to customize:
- Title typography and color
- Card background or shadow
- Read More button style
- Image border radius
Optional Features
- Add Filter by Category (Pro only)
- Add Load More or Pagination
- Add Animations or Hover Effects