
Table of Contents
This comprehensive guide will help you install, set up, and customize your CCTV Services Pro theme to build a professional, secure, and engaging website for your surveillance and monitoring solutions.
CCTV Service Pro Theme Documentation
Introduction
This kit is designed to help you create a sleek, professional, and user-friendly website for your CCTV services. Whether you offer home surveillance, commercial monitoring, remote access solutions, or advanced security systems, this template includes all the essential features to highlight your services and attract new clients with confidence.
Customizing Your Website
Global Settings
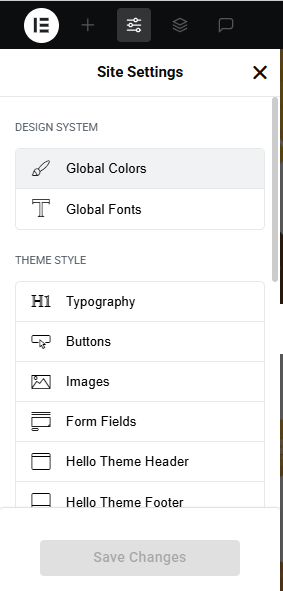
To set global styles:
- Go to Elementor > Site Settings.
- Adjust typography, colors, and layout settings.
Header & Footer Setup
- Use Elementor Theme Builder to edit the header and footer.
- Customize the navigation menu, logo, and contact details.
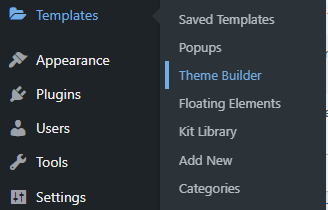

You can drag and drop the elementor widget’s menu first. If you’d like, you can add items or simply drag each one, after which you can add a icon list from the widget and apply a custom style from the style option.
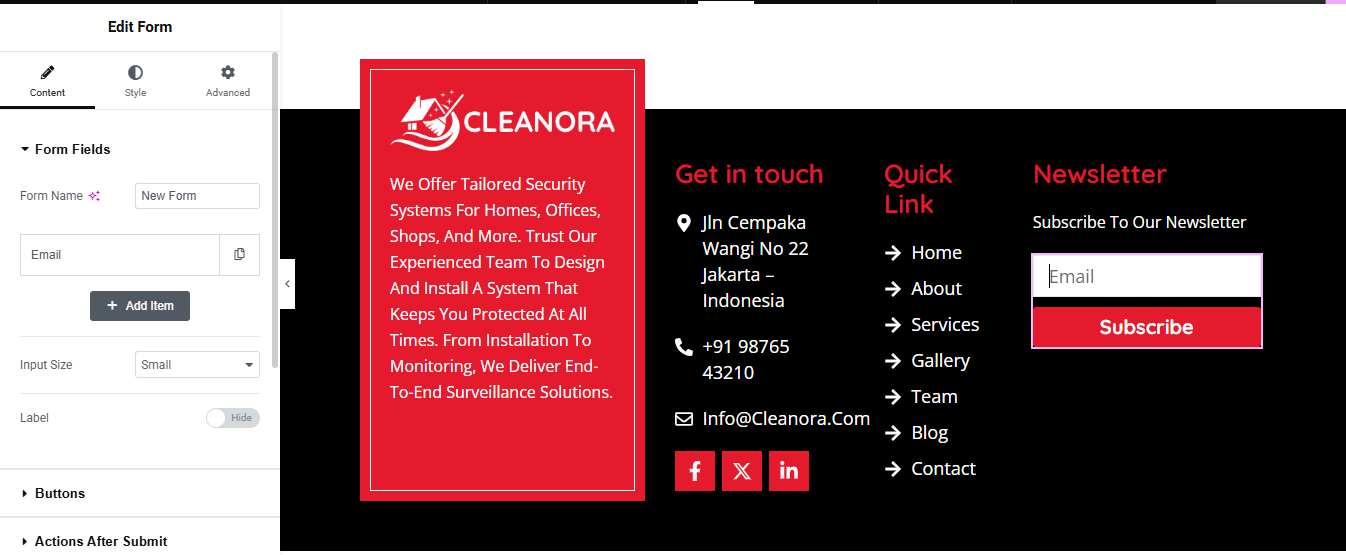
you can add newslatter form, timing, contact details, logo, gallery, menu and if you wish in footer, and create you best design.
Home Page Setup
Using Pre-Built Layouts
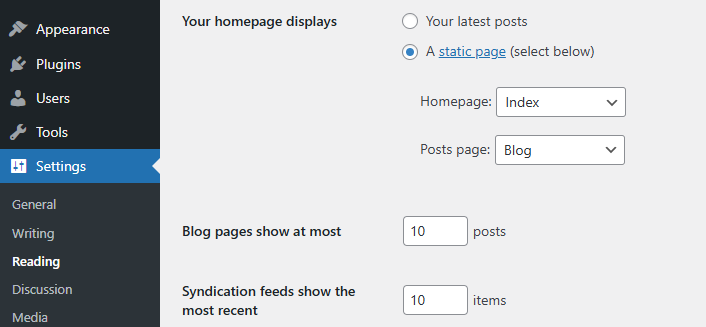
Navigate to Setting >> Reading
Choose the Static Page option.
Choose an existing homepage or create a new one.
Add The Section in home page using elementor
Add components such as these using the Drag & Drop Builder:
- Hero Slider Section
- icon box section
- about section
- achievements section
- services section
- gallery section
- why choose us section
- testimonial section
- team section
- FAQ & Contact section
- blog section
Main Hero Section
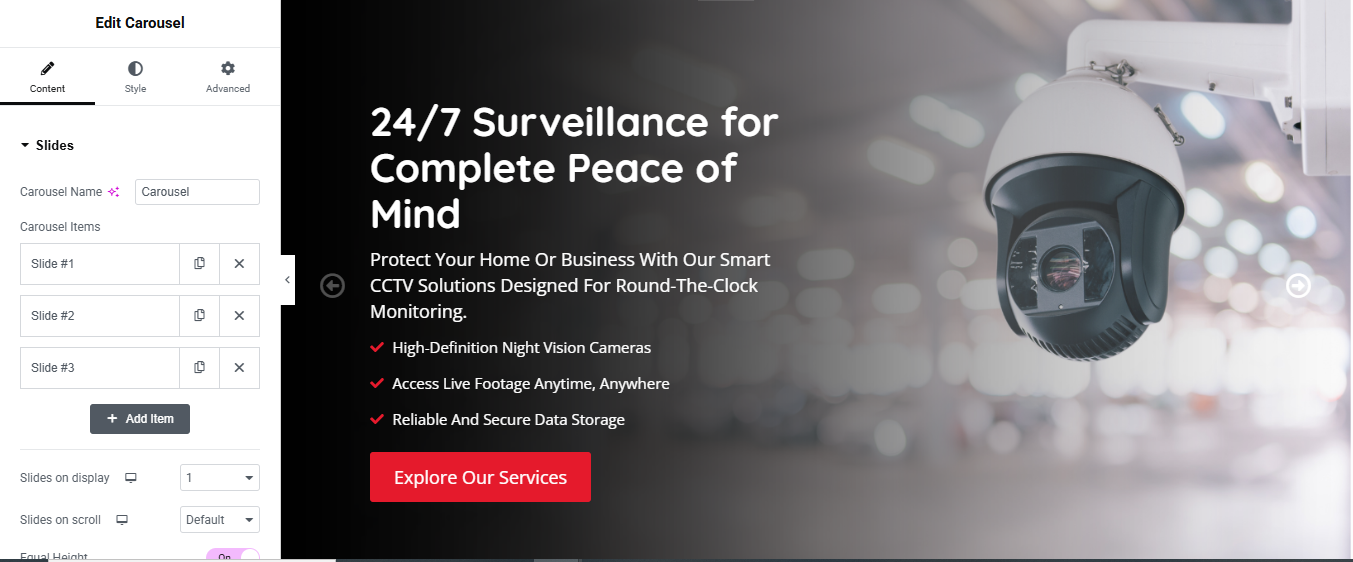
Add a Carousel Widget
- If using Elementor Pro: Use the Slides widget.
- Customize the Carousel
A. Add Carousel Widget:
- Drag the Slides widget into your section.
B. Configure Slide Content:
- Click each slide to edit:
- Title:
- Description:
- Button Text:
C. Customize Background:
- Under each slide, set a background image or overlay as needed.
- Style Your Carousel
- Content Position: Set to Left or Center-Left
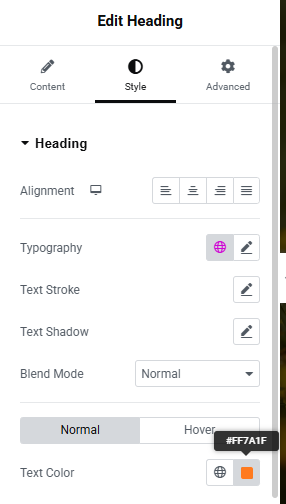
- Text Color: White
- Background Overlay: Add a semi-dark overlay for readability
- Typography: Use bold fonts for headers
- Navigation Arrows: Enable/disable as needed
Icon Box Section
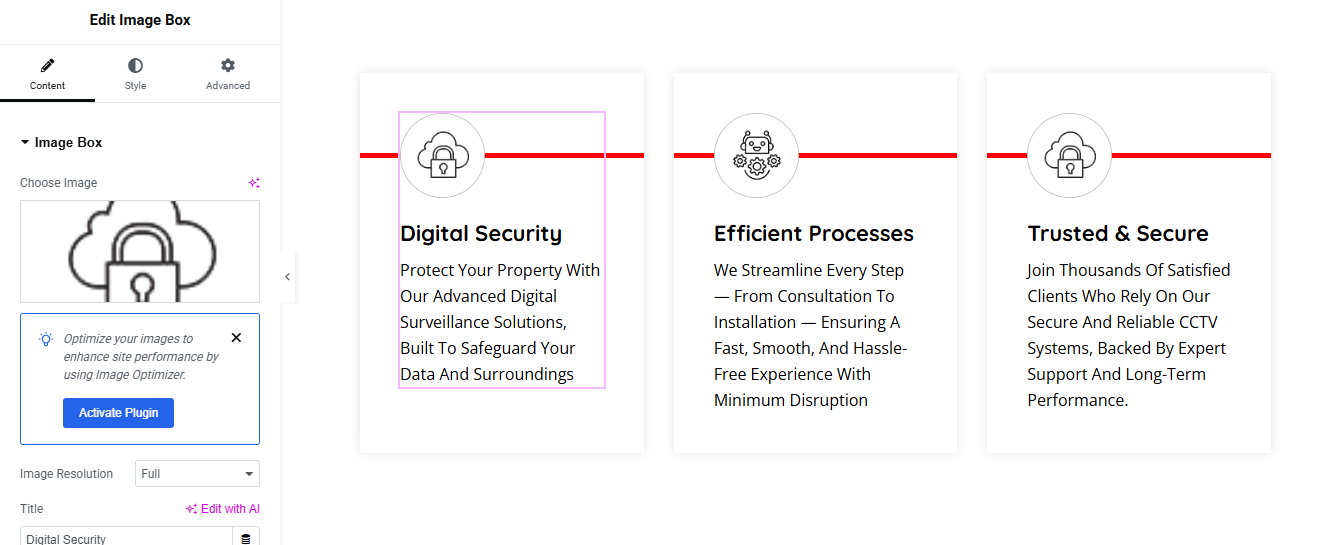
Create a 3-Column Icon Box Section in Elementor
- Create a New Section
- Open your page in Elementor.
- Click the ➕ icon to add a new section.
Choose the 3-column structure.
- Add the Icon Box Widget
- In the Elementor panel, search for “Icon Box”.
- Drag and drop the Icon Box widget into each of the three columns.
Customize Each Icon Box
- For each column:
- Icon: Choose relevant icons (e.g., camera, wrench, shield).
- Title: Add service titles
- Description: Briefly explain each service.
- Link: Optionally link to a detailed service page.
Style the Section
- Use the Style tab to adjust:
- Icon size and color
- Typography for titles and descriptions
- Box padding, background, and borders
About Section
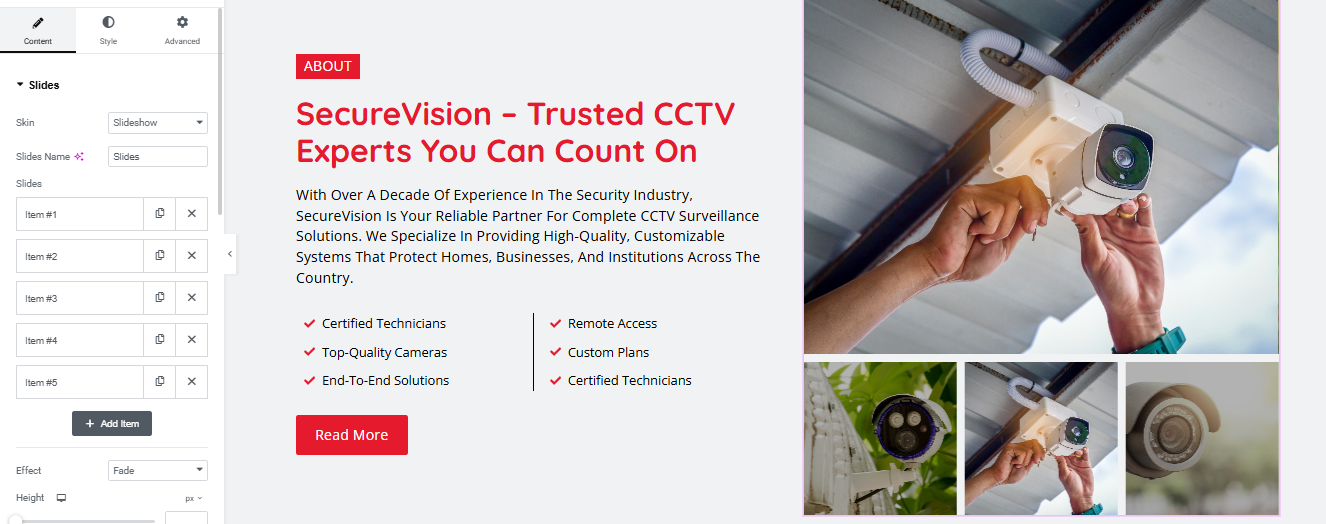
Left Column: Add Title, Description, Bullet Points & Button
- Heading Widget: Add your section title
- Text Editor Widget: Add a short paragraph describing
- List Widget: Use bullet points to highlight key features
- Button Widget: Add a call-to-action
- Right Column: Add an Image Slideshow
Drag in the Slides Widget (Pro) or use a third-party carousel widget.
- Upload 2–4 high-quality images showing your team, installations, or equipment.
- Customize:
- Transition effect: Fade or slide
- Autoplay: On
- Navigation arrows: Optional
Style the Section
- Use the Style tab to:
- Match your brand colors
- Adjust spacing and padding
Achievement Section
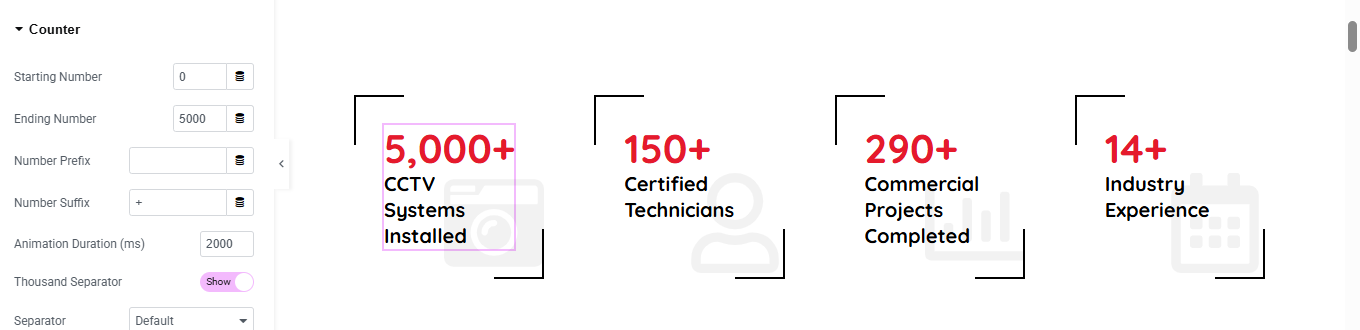
Drag in “Counter” Widgets
- In the Elementor Widgets Panel, search for Counter.
- Drag and drop one Counter widget into each column.
- Edit Each Counter
- Start Number: Usually 0
- End Number: e.g., 150, 2000, etc.
- Number Prefix/Suffix: e.g., +, %, etc.
- Title: e.g., “Happy Clients”, “Projects Completed”
Style the Counters
- Customize:
- Number Color & Typography
- Title Typography
- Spacing
- Alignment (center is most common)
Service Section
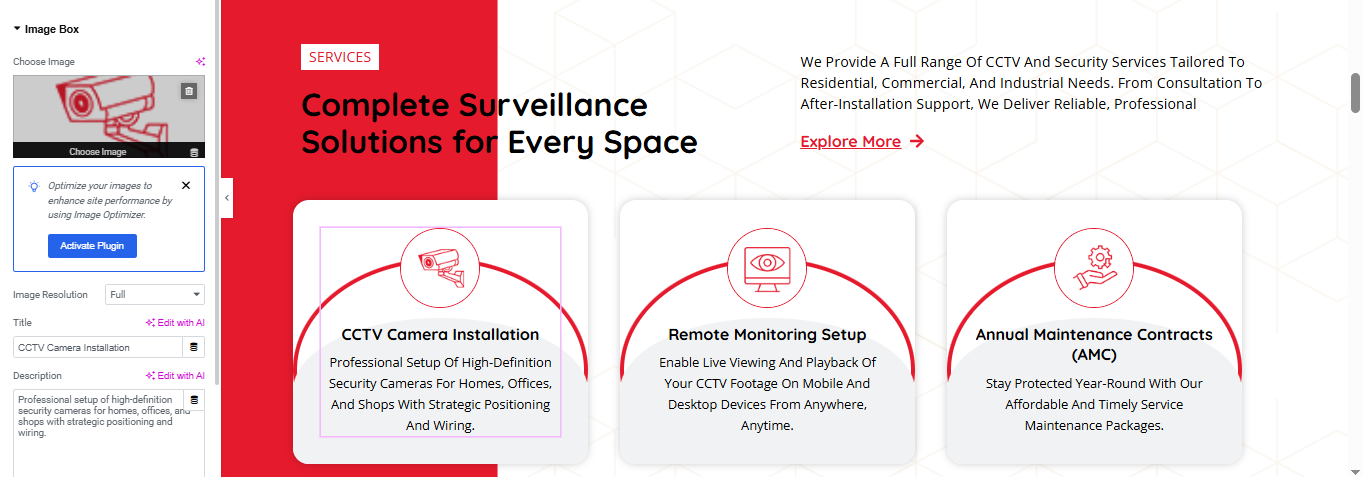
Add Inner Containers for Each Service
- Add a Container Inside
- Inside Each Service Container
- a. Image Widget
- Drag and drop Image widget at the top.
- Upload relevant image
- b. Heading Widget
- Title:
- Style:
- Color: Black
- Font weight: 700
- c. Text Editor Widget
- Description paragraph
Style Service Card Container
- a. Style Tab
- Background Color (Normal): White
- Padding: e.g., 30px on all sides
- Border Radius: 8–12px
- Box Shadow: Optional (for depth)
- b. Hover Background Effect
- Scroll to Hover under the same Style tab
- Background Color on Hover: #ed1c24 (red)
- Text Color on Hover
Gallery Section
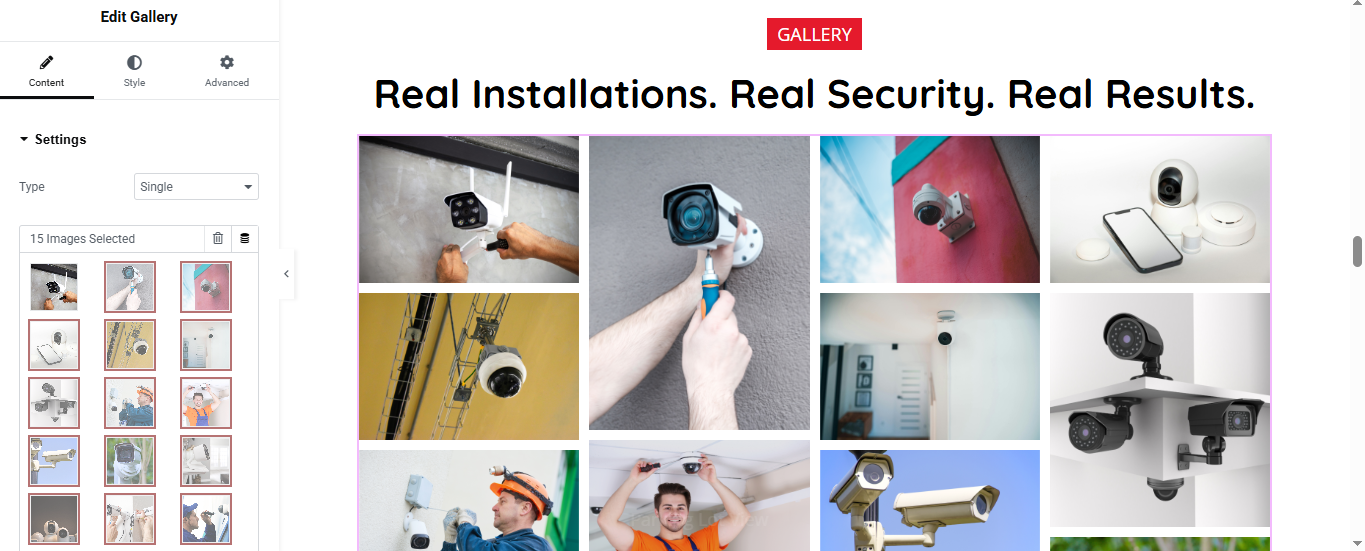
Insert a Heading for the Section Title
- Drag the Heading widget into the section.
- Enter a title
- Style it using the Style tab (font, size, color).
Add the Image Gallery Widget
- Search for “Gallery” or “Image Gallery” in the Elementor panel.
- Drag the Basic Gallery widget (or Pro Gallery if available) below the heading.
- Upload your CCTV-related images.
Enable Masonry Layout and Set Columns to 4
- In the Content tab of the Gallery widget:
- Set Layout to Masonry.
- Set Columns to 4.
why choose us Section
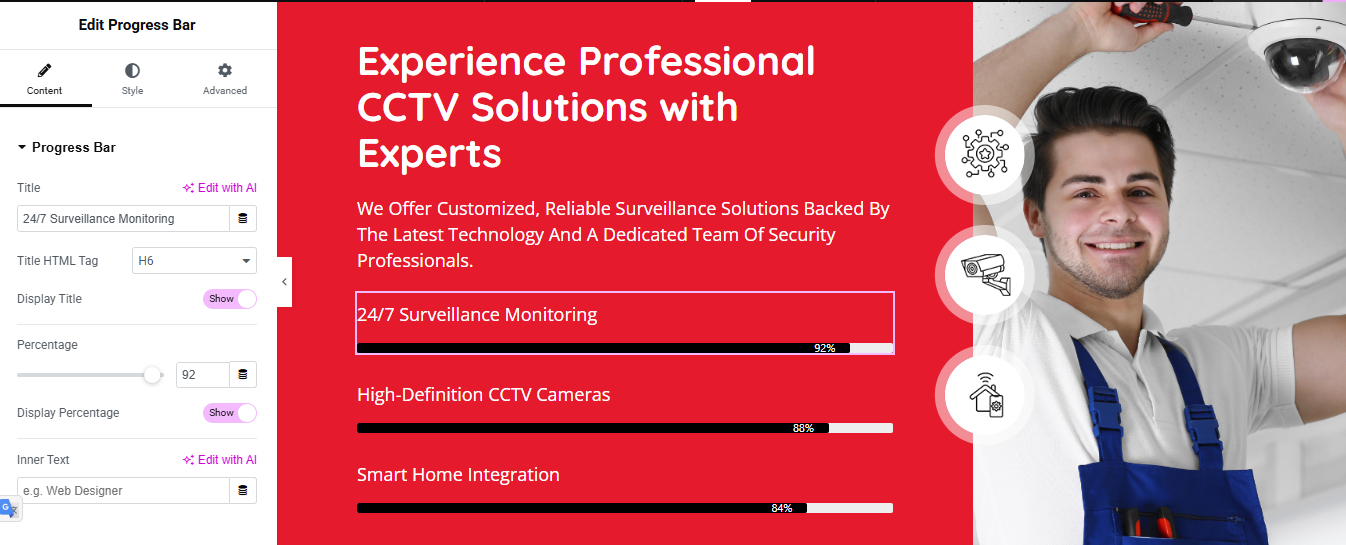
Add a New Section with Two Columns
- Set Column Widths:
- Left: 65%
- Right: 35%
- Right-click the column handle → “Edit Column” → Adjust width under Layout.
Left Column: Add Title, Description & Progress Bars
- Heading Widget: Add a title
- Text Editor Widget: Add a short paragraph
- Progress Bar Widget (add 3):
Right Column: Add Background Image & Icons
- Edit Column → Style tab → Set a Background Image (e.g., CCTV camera, control room).
- Add 3 Icon Widgets:
- Use icons like 🔒 (security), 🎥 (camera), ⚙️ (settings).
- Position them vertically or in a triangle layout using Inner Sections or Spacer widgets.
- Style with white or accent colors to contrast the background.
Testimonial Section
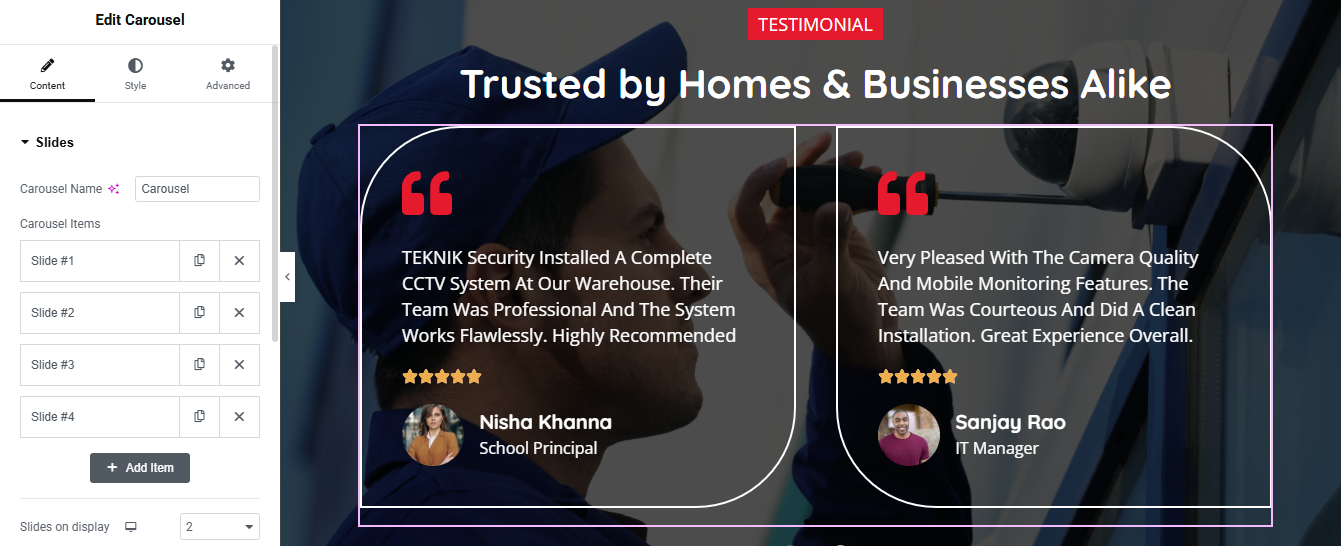
Add a New Section with Two Columns
- In Elementor, click the ➕ icon to add a new section.
- Choose the 2-column layout.
- Set Column Widths: Left 50%, Right 50% (or adjust as needed).
Add Title and Description
- Heading Widget: Add a title
- Text Editor Widget:
- You can use either Elementor Pro’s Testimonial Carousel
- Drag in the Testimonial Carousel widget (or similar).
Add 3–5 client reviews:
- quote icon
- Review text
- Star rating (optional)
- image box for client image name and position
- Set carousel to autoplay with smooth transitions.
- Use dots or arrows for navigation.
- Add box shadow or border radius for a polished look.
Team Section Section
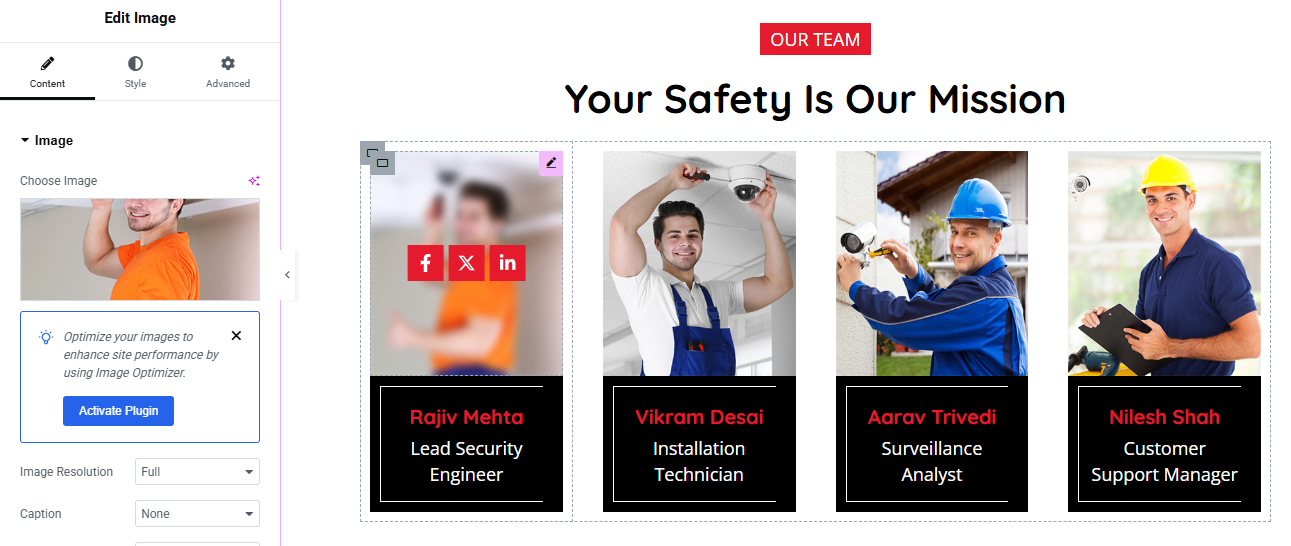
Add Team Member Content to Each Column
- For each column:
- Add an Image widget for the team member photo.
- Below the image, add:
- Heading widget for the name
- Text Editor widget for the designation
Apply Hover Blur Effect on Image
- Select the Image widget → go to Advanced > Custom CSS (Elementor Pro required).
- Paste this CSS:
- selector img {
transition: all 0.3s ease-in-out;
} - selector:hover img {
filter: blur(3px);
transform: scale(1.05);
}
Add Social Icons on Hover
- Drag a Social Icons widget below the image or overlay it using Position: Absolute.
- Use icons like Facebook, LinkedIn, WhatsApp.
- Set Opacity: 0 by default and Opacity: 1 on hover using motion effects or CSS.
FAQ & Contact Section
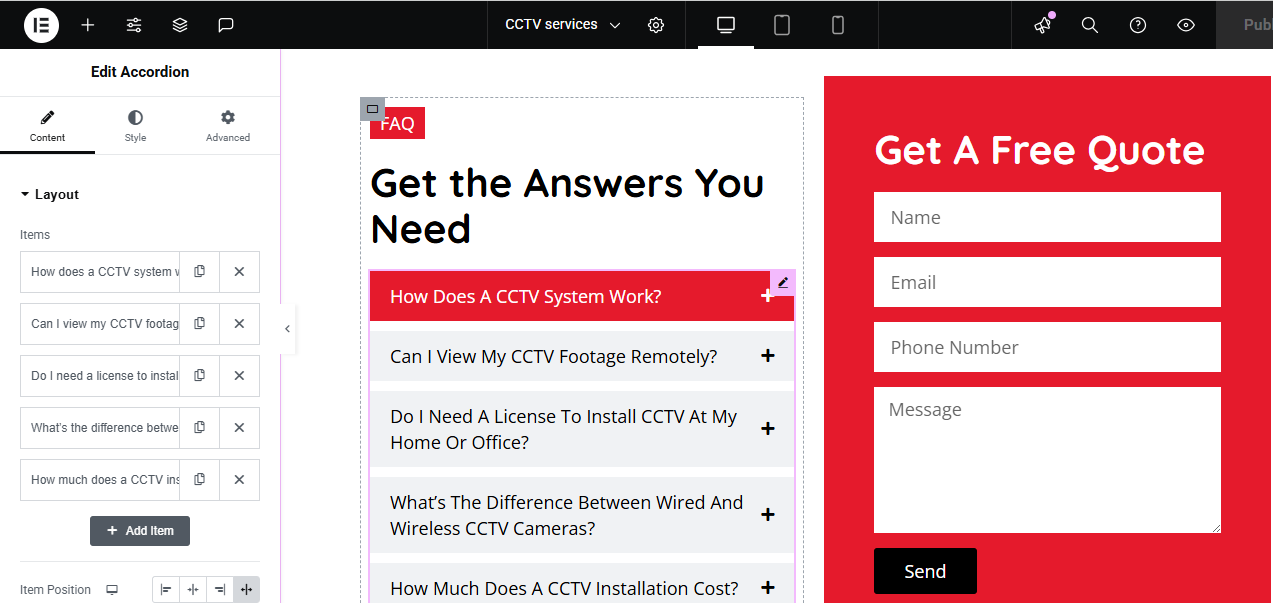
2-Column Team Section with FAQ & Contact Form
- Add a New Section with Two Columns
Left Column: Add Title and FAQ Accordion
- Heading Widget: Add a title like “Frequently Asked Questions”.
- Accordion Widget: Drag in the Accordion widget.
- Add 3–5 common questions
- Customize icons, spacing, and typography.
Right Column: Add Red Background, Title & Contact Form
- Edit Column → Style tab → Set Background Color to red
- Add a Heading Widget: Title
- Add a Form Widget
- Fields: Name, Email, Phone Number, Message
- Submit Button: Label it “Send”
Blog Section
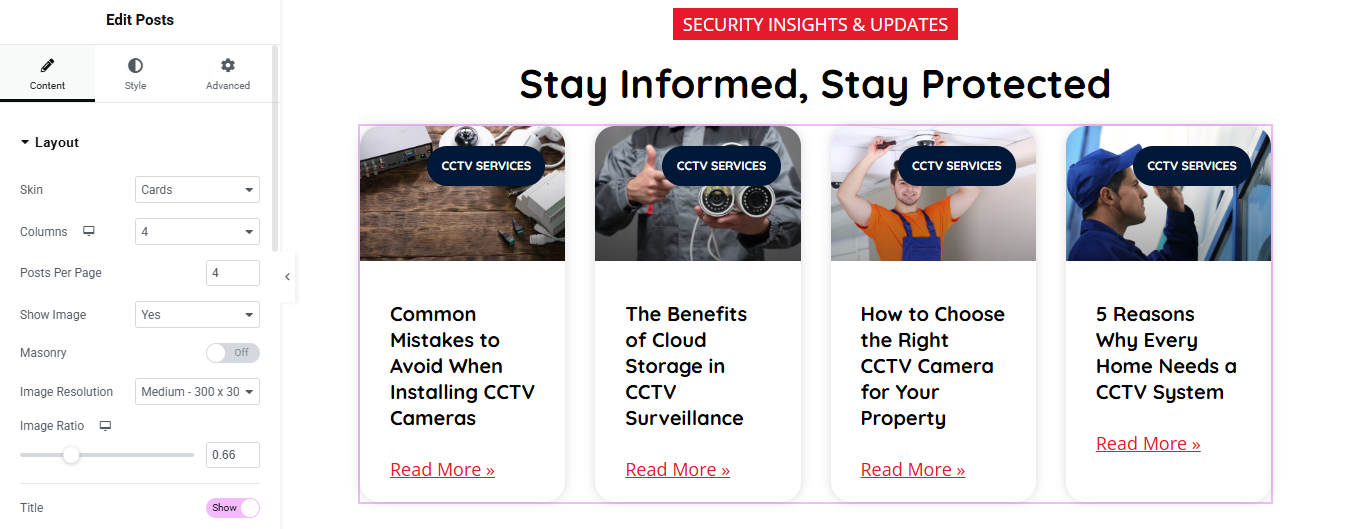
Add Posts Widget
- (Choose method based on Elementor version)
- Elementor Pro (Posts Widget)
- Drag the “Posts” widget into the section.
- Posts will automatically show your latest blog posts.
- Customize:
- Layout: Grid / Carousel / Masonry
- Columns: 3 or 4 recommended
- Show/Hide: Title, Excerpt, Author, Date, etc.
- Image Size: Thumbnail, Medium, Custom
Style the Blog Section
- Use the Style tab to customize:
- Title typography and color
- Card background or shadow
- Read More button style
- Image border radius
Optional Features
- Add Filter by Category (Pro only)
- Add Load More or Pagination
- Add Animations or Hover Effects